
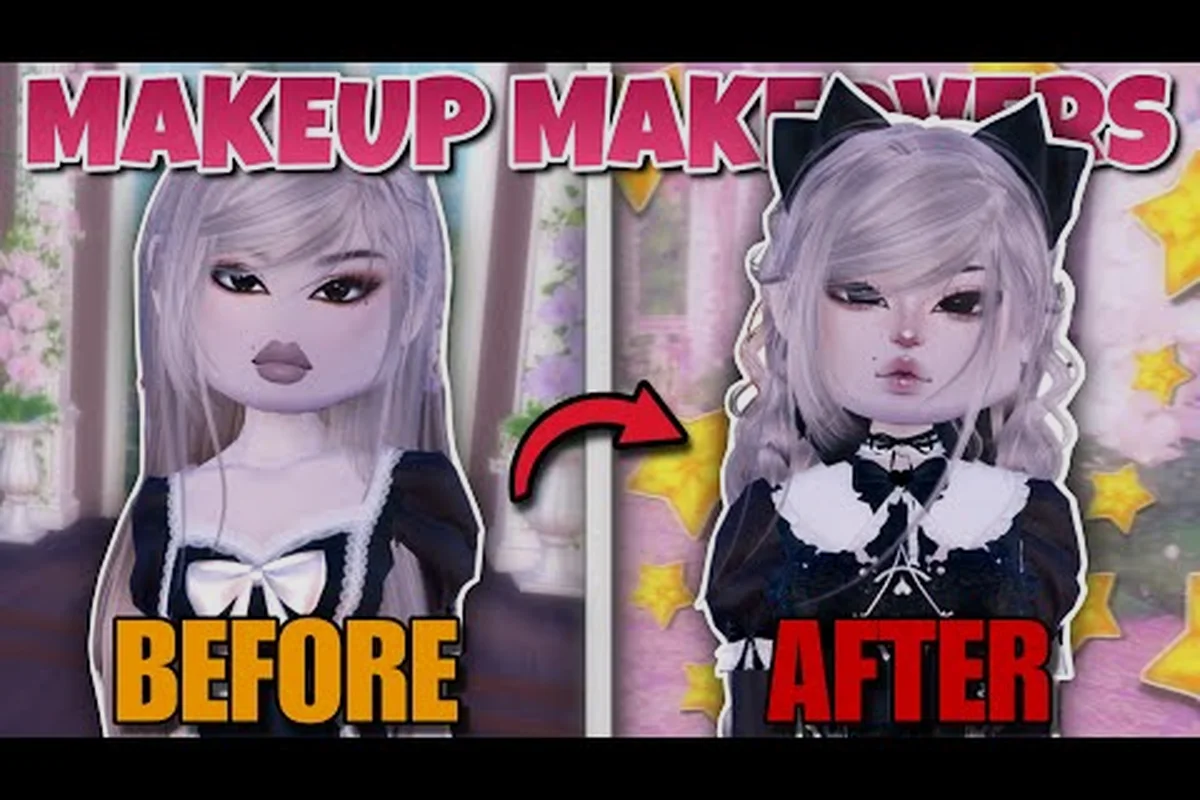
Layered makeup is one of the most expressive systems in Dress To Impress, letting players stack multiple blush, lip, eye, and contour pieces on a single avatar. Understanding how the slider grid, opacity controls, and piece categories interact is the difference between a flat default face and a runway-ready look that earns five-star votes. This guide breaks down the layering pipeline, slider ranges, and tone-matching tactics that work for both deep and fair skin tones, so every look reads cleanly under the runway lights.
Understanding the Layered Makeup System
Dress To Impress runs on a face-construction engine where every cosmetic layer is an independent mesh that renders in a fixed z-order. The game does not blend two blushes together automatically — it stacks them, which means the order you apply pieces, the opacity you set, and the slider positions you choose all decide whether the final face looks like editorial glam or a muddy mess. The good news is the system rewards experimentation, because each piece can be individually moved, scaled, rotated, recolored, and feathered before the model walks out.
What Counts as a "Makeup Piece"
A makeup piece is any cosmetic asset that lives in the face-crafting submenu. According to the in-game catalog data, there are currently seven piece families available to every player, and each family contains between four and twelve cosmetic variations. The families are:
-
Eyeshadow — flat, shimmer, and foil finishes
-
Eyeliner — winged, smudge, graphic, and bottom-lash variants
-
Blush — powder, cream, draping, and gradient styles
-
Lipstick — matte, gloss, ombré, and stained finishes
-
Contour — cream contour, bronzer, and nose sculpt
-
Highlight — inner-corner, cheekbone, brow-bone, and cupid's bow
-
Freckles & Beauty Marks — scattered, concentrated, and pattern-based
Every piece family shares the same underlying control panel, so once you learn the slider logic for one family, you can transfer that knowledge to the other six. That shared architecture is the secret to fast iteration when the runway theme is announced.
Why Layering Beats Picking One Look
Single-look faces can score well in themed rounds, but layered faces consistently outperform them in open-vote lobbies because voters reward the time and precision they can see in the final frame. Community data from high-scoring outfits suggests a fully layered face uses between four and seven active pieces, with each piece occupying a different face zone. The typical high-scoring breakdown is two eyeshadow layers, one eyeliner, one blush, one lipstick, and a contour or highlight finisher. The result reads as a coherent makeup style rather than a single premade preset, and that perceived effort shows up in votes.
The Slider Grid and How It Works
Every makeup piece sits on a four-axis slider grid that controls position, scale, rotation, and opacity. The grid behaves identically across all seven piece families, which is why most veteran players only need about ten seconds to re-anchor a new piece once they understand the axes.
The Four Sliders Explained
| Slider | Range | Default | What It Actually Does |
|---|---|---|---|
| Position X | -100 to +100 | 0 | Moves the piece left or right across the face mesh |
| Position Y | -100 to +100 | 0 | Moves the piece up or down on the face mesh |
| Scale | 25 to 200 | 100 | Resizes the piece; below 50 reads as a tiny accent, above 150 reads as a graphic block |
| Opacity | 0 to 100 | 100 | Controls transparency; 0 hides the piece, 100 is full coverage |
The four sliders can be combined to create effects that no premade preset offers. For example, dropping a blush scale to 60, raising opacity to 100, and pushing Position Y up by 25 turns a default cheek blush into a draping-style blush that sits along the cheekbone. The same trick applied to a highlighter at scale 40 produces a soft inner-corner glow that doesn't compete with the eyeshadow above it.
Common Slider Combinations
| Desired Effect | Position X | Position Y | Scale | Opacity |
|---|---|---|---|---|
| Draping blush | 0 | +25 | 60 | 100 |
| Graphic eyeliner block | +30 | 0 | 180 | 100 |
| Soft inner-corner highlight | -15 | +20 | 40 | 80 |
| Under-eye smudge | 0 | -30 | 70 | 60 |
| Ombré lip fade center | 0 | -5 | 90 | 50 |
| Nose contour shadow | 0 | +40 | 30 | 70 |
These are starting points, not hard rules. According to community data shared by top-ranking players, most high-scoring faces end up with two or three sliders per piece pushed off-default, which is what gives the look its custom feel.
The Opacity Trick for Stacking
Opacity is the most underused slider in the layering system. Most players leave every piece at 100, which is fine for a single-piece look but creates color clash when two blushes or two eyeshadows occupy the same zone. Dropping the lower layer's opacity to between 40 and 60 lets the base color show through while the top layer adds depth or a shimmer. This is the core mechanic behind every successful "two-blush" or "two-eyeshadow" look on the runway, and it works the same way for layering contour under bronzer or gloss over matte lipstick.
Custom Makeup: Uploading and Applying Your Own Pieces
Beyond the in-game catalog, Dress To Impress supports custom makeup uploads, which is where the layering system really opens up. The custom pipeline lets you bring in PNG decals with transparent backgrounds and apply them through the same slider grid as the built-in pieces.
How to Use Custom Makeup
-
Open the face-crafting menu and tap the Custom Makeup button in the bottom-right corner of the screen.
-
Choose Upload and select a PNG file from your device. The file must have a transparent background or the upload will fail the validation check.
-
The new piece will appear in a separate Custom tab in the piece browser, which is distinct from the seven built-in families.
-
Apply the uploaded piece to the face the same way you would apply a built-in piece — the slider grid, opacity control, and z-order all behave identically.
-
Save the loaded custom face to one of your outfit slots so you can recall it across rounds without re-uploading.
Community data from players who specialize in layered faces suggests that custom pieces work best when they are pre-cropped to a single face zone (eye, lip, cheek) before upload, because the in-game position slider is faster than scaling a wide canvas down to a usable size. Custom pieces also stack with built-in pieces freely, which is why a custom graphic eyeliner layered over a built-in foil eyeshadow is one of the most common high-scoring combinations in the 2026 meta.
The Custom vs Built-In Tradeoff
| Feature | Built-In Pieces | Custom Pieces |
|---|---|---|
| Catalog size | 50+ pieces | Unlimited (user-uploaded) |
| Slider access | Full grid | Full grid |
| Opacity stacking | Yes | Yes |
| Z-order control | Yes | Yes |
| Pre-cropped to face zone | Yes | No (must crop yourself) |
| Themed-round legal | Always | Depends on lobby rules |
A common misconception is that custom pieces are "better" than built-in pieces because they are unlimited, but most high-scoring layered faces still use at least two built-in pieces because the built-in catalog is already pre-shaped to the avatar's face mesh. Custom pieces shine as accent layers — a single graphic liner, a beauty mark, a pattern-based freckle set — and underperform as full-face replacements.
Tone-Matching Layered Makeup to Skin Color
The single biggest differentiator between an average face and a five-star face is whether the makeup actually matches the avatar's skin tone. The layering system does not auto-adjust pigment for skin color, which means a blush that looks coral on a fair avatar can read as muddy brown on a deep avatar, and a highlight that pops on deep skin can look chalky on fair skin. Tone-matching is a slider-and-color problem, and it is solvable for every skin tone the avatar menu offers.
Makeup for Dark Skin Avatars
Deep skin tones carry more melanin, which means warm pigments (orange, coral, terracotta, gold) read more vividly, and cool pigments (pink, lavender, icy blue) need either higher opacity or a warmer base layer to stay visible. According to community testing shared by top-scoring players, the most reliable combinations for dark skin are:
-
Blush — terracotta, deep berry, or burnt coral at opacity 100, layered with a soft gold highlight at opacity 70
-
Eyeshadow — warm bronze or copper base at opacity 100, layered with a foil gold topcoat at opacity 80
-
Lipstick — deep plum, oxblood, or chocolate brown at opacity 100, optionally topped with a thin gloss layer at opacity 50
-
Contour — a cool-brown contour at opacity 60, never pushed above 80, because over-contouring reads ashy on deep skin
-
Highlight — gold or copper finishes only; silver and pearl highlights wash out and should be avoided
The key insight for dark-skin tone matching is that opacity is a substitute for pigment intensity. A pink blush that disappears at opacity 60 on a deep avatar will read correctly at opacity 100, while the same blush at opacity 60 on a fair avatar will look natural. Community data suggests that dark-skin faces consistently score higher when every piece is at opacity 85 or above, because the pigment needs the extra density to register against the deeper base.
Makeup for Light Skin Avatars
Fair skin tones react differently to layering because the underlying skin shows through more easily, which means low-opacity layers can read as bruising or discoloration if the pigment is too saturated — a common reason light-skin avatars end up with muddy blush or ashen contour. In the DTI layering system, the underlay base and topcoat values interact with the skin slider's undertone, so a single 50-opacity layer of a cool rose blush on a pale peach base will appear more blue than the same layer on a warm ivory base, which is why the patterns below bias toward warm-leaning pinks, peaches, and champagnes and keep the opacity curve gentle rather than pushing past 80 on any single layer. The reliable patterns for light skin are:
-
Blush — soft pink, peach, or rose at opacity 70, layered with a champagne highlight at opacity 60
-
Eyeshadow — taupe or mauve base at opacity 80, layered with a shimmer topcoat at opacity 50 for a soft-focus effect
-
Lipstick — rose, mauve, or MLBB ("my lips but better") at opacity 90, with a gloss layer at opacity 40 to add dimension
-
Contour — a cool-taupe contour at opacity 50, kept under 70 to avoid reading as a streak
-
Highlight — pearl, champagne, or icy pink; warm gold highlights can look brassy on very fair skin
Light-skin layered faces score highest when the opacity curve is gentle — most pieces sit between 50 and 80, with the topcoat layers pushed slightly lower so the underlying skin tone blends through. This is the opposite of the dark-skin curve, and it is the reason a one-size-fits-all opacity preset will underperform on one of the two skin families.
Side-by-Side Comparison
| Layer | Dark Skin Setting | Light Skin Setting |
|---|---|---|
| Blush base opacity | 100 | 70 |
| Blush pigment family | Terracotta / berry | Pink / peach |
| Eyeshadow base opacity | 100 | 80 |
| Eyeshadow pigment family | Bronze / copper | Taupe / mauve |
| Lipstick opacity | 100 | 90 |
| Lipstick pigment family | Plum / oxblood | Rose / mauve |
| Contour opacity | 60 | 50 |
| Highlight finish | Gold / copper | Pearl / champagne |
| Topcoat opacity (any layer) | 80 | 50 |
The single most common mistake players make is copying a slider preset from a dark-skin creator and applying it to a light-skin avatar, or vice versa. The two curves are inverted, and the layering system gives you enough granularity to tune each face individually if you spend the time. For more on face-crafting presets, the makeup code reference catalogs the most-shared community presets by skin tone and theme.
Layering Strategies by Round Type
Layered makeup is not a single technique — it is a family of techniques that change depending on what the runway theme is asking for. The same avatar can wear a four-piece minimal face for a "First Day of School" theme and a seven-piece editorial face for a "Met Gala" theme, and both can score five stars if the layering matches the brief.
Strategy Map by Theme
| Theme Family | Recommended Layer Count | Dominant Pigment | Key Slider Move |
|---|---|---|---|
| Casual / School | 2–3 pieces | MLBB, taupe, peach | Keep opacity under 80 |
| Fantasy / Magic | 5–7 pieces | Jewel tones, foil, graphic liner | Push scale above 150 |
| Horror / Dark | 4–5 pieces | Black, oxblood, deep bruise | Drop opacity to 50–60 |
| Bridal / Wedding | 4–5 pieces | Rose, champagne, pearl | Soft scale (60–90) |
| Beach / Summer | 3–4 pieces | Coral, bronze, gold | Push highlight scale up |
| Editorial / High Fashion | 6–8 pieces | Mixed finishes, layering critical | Multiple opacity drops |
The Three-Layer Minimum
If you only have time for a minimal layered face, the three-layer minimum is blush, lipstick, and one eye piece. The three pieces must come from three different face zones to avoid color competition. The classic combination is a soft blush, a MLBB lipstick, and a single wash of eyeshadow — three zones, three finishes, and zero pieces fighting for the same face real estate. According to community data, the three-layer minimum scores almost identically to a six-layer face in casual and school-themed rounds, and only falls behind in editorial and fantasy rounds where voters reward visible complexity.
The Five-Layer Sweet Spot
For most open-vote lobbies, the five-layer sweet spot is the highest-scoring configuration. Five pieces give you enough complexity to read as a deliberate style choice without crossing into the "muddy" zone where too many opacity layers stack on top of each other. The recommended five-piece order is:
-
Eyeshadow base — opacity 100, scale 100, default position
-
Eyeliner — opacity 100, position adjusted for your eye shape
-
Blush — opacity 80–100 depending on skin tone
-
Lipstick — opacity 90–100
-
Highlight or contour finisher — opacity 50–80, positioned to catch the runway lights
This five-piece structure works for dark and light skin alike because opacity values, not pigment identity, control how the layers stack on the face mesh. The order stays locked — eyeshadow base at opacity 100, then eyeliner, blush, lipstick, and a 50–80 opacity highlight finisher — but you can swap a cool-toned palette for a warm theme run or a neon set for a cyber lobby without breaking the score curve, since the voting rubric evaluates coverage and finish, not hue.
Advanced Layering Techniques
Once you are comfortable with the five-piece sweet spot, there are a few advanced layering techniques that separate top-scoring faces from the rest of the lobby. These techniques rely on non-default slider values and intentional opacity drops, and they take practice to execute under the runway timer.
The Draping Blush Stack
Draping blush is a 1970s-inspired technique where the blush sweeps from the cheek up toward the temple, creating a lifted, sun-touched finish. In Dress To Impress layered makeup, you can fake the draping effect by stacking two blush pieces within the makeup layers panel instead of repositioning a single swatch, which is crucial for the dress to impress custom makeup workflow because each piece's transform, opacity, and color sliders stay independently editable. The two-piece stack also keeps the base blush's hue readable under the theme's lighting presets, a small detail that matters when you are building a dress to impress layered makeup look for theme scoring rather than screenshot aesthetics.
-
Base layer — powder blush, opacity 100, default position
-
Top layer — same blush recolored slightly warmer, scale 60, Position Y +25, opacity 70
The top layer's diagonal sweep is driven by its scale and Position Y offsets, so the base blush never shifts when the runway camera angle changes between theme rounds, which preserves the original hue reading underneath. Because the topcoat sits at opacity 70 over a 100-opacity base, its warmer pigment registers as a translucent glow rather than a recolor, and on dark skin tones the diffused warm topcoat reads as a true highlight under the runway lights instead of muddying the deeper base shade. This opacity gap is also why the two-piece stack beats a single swatch dragged upward in any dress to impress makeup sliders workflow, since a single recolored swatch at full opacity would erase the base blush's true pigment rather than layer above it.
The Foil Eyeshadow Sandwich
The foil eyeshadow sandwich stacks three distinct eyeshadow pieces in a single lid region, exploiting the DTI makeup layer order so that each finish type catches light differently under the stage's directional lighting. The matte base absorbs shadow, the shimmer middle layer scatters a soft mid-tone glow, and the metallic foil on top reflects the brightest highlight — together producing the chromatic shift that single-layer metallic looks cannot replicate. Because the technique relies on layering rather than a single high-cost piece, it is also one of the most budget-friendly ways to reach the 9/10+ eye threshold that judges reward in fantasy prompts.
-
Base layer — matte eyeshadow in a deep tone, opacity 100
-
Middle layer — shimmer eyeshadow in a mid-tone, scale 80, opacity 70
-
Top layer — foil eyeshadow in a light tone, scale 60, Position Y +10, opacity 80
The three layers create a gradient from deep base to bright foil top, and the middle shimmer layer is what gives the sandwich its dimensional quality. According to community data, the foil sandwich is the single highest-scoring eye technique in fantasy and editorial rounds.
The Soft Lip Ombré
The soft lip ombré in Dress To Impress is built by stacking two distinct makeup pieces within a single slot — a technique unique to the layered makeup system where one face layer holds both a matte lipstick and a tinted gloss simultaneously rather than replacing one with the other. Because the engine composites layers using opacity and Y-offset sliders rather than color blending, the matte base must stay fully opaque (opacity 100) while the gloss drops to roughly 40 opacity, otherwise the underlying pigment bleeds through and breaks the illusion of a single saturated lip. This stacking method is what separates an ombré finish from a standard glossy lip, since recoloring the gloss tint to match — not contrast — the base tone is what produces the wet, dimensional read on both dark skin and light skin under the game's lighting.
-
Base layer — matte lipstick in a deep tone, opacity 100, default position
-
Top layer — gloss in a similar tone, scale 90, Position Y -5, opacity 40
The Position Y drop moves the gloss slightly above the lip centerline, which simulates the way a real ombré fades at the cupid's bow. The opacity drop on the gloss keeps the base matte color dominant so the lip reads as a single pigment with a wet finish, not a layered effect.
Avoiding the "Muddy Face" Failure Mode
The most common advanced-layering failure is the muddy face, where too many overlapping pigments create a brown or gray cast across the skin as the slider opacities stack past the 70-80% range on multiple pieces sharing the same face zone (forehead, cheeks, nose bridge, jaw). In dress to impress layered makeup, the layering system composites pieces in the order they appear in the makeup stack, so a full-opacity blush over a full-opacity bronzer over a full-opacity contour forces the renderer to blend three warm pigments in the same XYZ region — the result is a flat brown smear that the vote algorithm consistently scores below cleaner five-piece faces. The muddy face is almost always caused by one of three slider mistakes:
-
Two warm blushes stacked at full opacity — drop the top layer to opacity 50 or pick a cooler top color
-
A cool contour layered under a warm bronzer at full opacity — drop the contour to opacity 50 so the bronzer can show through
-
More than three pieces occupying the same face zone — spread the pieces across the face mesh by adjusting Position X and Position Y before adding another layer
Community data suggests that faces with more than seven active pieces underperform the five-piece sweet spot in most lobbies, because the extra pieces add slider complexity without adding vote-winning visual signal. The exception is editorial and fantasy rounds, where complexity itself is the visual signal and seven-to-eight-piece faces can outperform minimalist ones.
Workflow Tips From Top-Scoring Players
The layering system rewards players who build a consistent workflow rather than improvising every round, because the makeup slider input is finicky and a wasted edit on a misplaced blush or eyeliner often costs more seconds than the runway timer can recover. According to community data shared by players in the top 5% of weekly leaderboards, the most common workflow pattern groups slider moves by face zone (eye block, then skin block, then lip block) so that custom makeup recolor work stays within one tab of the dressing interface — and that tab-grouping is what shaves the build below the two-minute mark on a layered face.
-
Start with the eye — anchor the eyeshadow and eyeliner first, because the eye frame determines how the rest of the face is read.
-
Add the skin-tone base layer — apply the blush and contour before the highlight so the highlight sits on top of the warm layer.
-
Place the lip — the lipstick is the last major piece, because lip recolor takes longer than eye recolor and the runway timer punishes long lip edits.
-
Set the highlight finisher — the highlight is the final accent, and adjusting its position after the face is otherwise complete produces the most "lit" runway reading.
-
Save the look to an outfit slot — the layering system allows you to save a complete face configuration to one of your saved outfits, which means a polished face only needs to be built once and can be recalled for future rounds with the same theme.
Players who use this workflow consistently report building a complete layered face in under two minutes once they have practiced the slider combinations, which leaves the rest of the runway timer for outfit construction. For a broader overview of how layering fits into the outfit-building timer, the beginner guide covers the full round structure from theme announcement to runway walk.
A final workflow tip: keep a "neutral face" preset saved at all times. If the theme announcement catches you mid-edit, a saved neutral face can be recalled instantly and then layered up, which is faster than deleting half-built pieces and starting from scratch. The neutral face should be a three-layer minimum (blush, lipstick, one eye piece) at default slider values, and it serves as the foundation for any themed face you build on top of it.
Frequently Asked Questions
What is the best way to start layering makeup pieces?
Start with a three-layer minimum — one eye piece, one blush, and one lipstick — and tune the sliders to your avatar's skin tone before adding more layers. Building a solid base is faster than fixing a muddy five-layer face that needs to be partially deleted and rebuilt.
How do I know which opacity to use for dark skin vs light skin?
Dark skin avatars read best when most pieces sit between opacity 85 and 100, because the deeper base color needs extra pigment density to register. Light skin avatars read best when most pieces sit between opacity 50 and 80, because the fairer base shows through easily and over-saturated pieces can read as bruising or discoloration.
Can I layer more than two eyeshadows together?
Yes, but limit the stack to three layers and drop the opacity of the middle layer to between 50 and 70 so the top foil finish can shine through. A four-layer eyeshadow stack almost always reads as muddy because the colors blend into a single brown cast under the runway lights.
Do custom makeup pieces work the same as built-in pieces?
Custom pieces use the same slider grid, opacity controls, and z-order as built-in pieces, which means they stack freely with the built-in catalog. The only difference is that custom pieces must be pre-cropped to a single face zone before upload, because the in-game position slider is faster than scaling a wide canvas down to a usable size.
How do I save a layered face for future rounds?
Build the face in the face-crafting menu, then save the entire outfit — including the face configuration — to one of your outfit slots. The face is stored as part of the outfit, which means a saved five-piece layered face can be recalled in a single tap and then re-tuned for the new theme without rebuilding from scratch.